|
|
|
Part 1 history of the car / sub-frame removal / engine rebuilding / transmission rebuilding / front suspension rebuilding / brakes rebuilding / yet to do.
Part 2 engine rebuilding (oil pump, cylinder head) / transmission rebuilding / steering.
Part 3 engine compartment / front suspension / engine, drive train and suspension installation / refurbishing heater boxes / reassembly of engine compartment.
Part 4 engine compartment / heater boxes (restored) / exhaust resonator / heater duct flaps / steering damper / brakes / rear axle / starting engine / rust repair / extra sound insulation / suspension rebound stops / speedometer / cleaning fuel lines / fender straightening.
I found the car in 1974 while still in college, working in Los Alamos, New Mexico, and looking for my first car. It was for sale on the "lemon lot" and I ended up buying it for $900. It had about 103K miles and the engine had been overhauled. The right front fender had been crushed and very poorly repaired by the seller. As I drove it away from the owner's house, his wife was standing in the doorway crying.
The car was purchased new by Fermor S. Church, who was the last director of the Boys Ranch in Los Alamos when the US Army took over the place in 1942 for the Manhattan Project. He was married to Peggy Pond Church, the daughter of the founder of the Boys Ranch, who wrote the book "The House at Otowi Bridge." F.S. Church kept good records and faithfully entered all the required maintenance records in the maintenance logbook. Before he sold the car, he totaled all the expenses for the 10 years he owned it; it cost him 11 cents per mile. I'm not sure, but he may have included the cost of a collision repair to the front end; there is evidence of the repairs made, which probably included a new fender and hood.
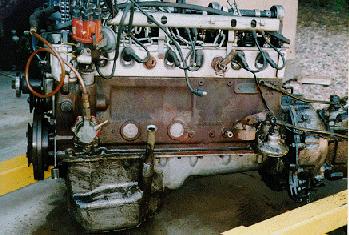
I drove it for about 8 years as my only car until it was put in retirement by a Scirocco (which I still drive daily). I did three valve jobs (never figured out why they would not last) and one overhaul (reground crank, new rings) in about 90 K miles. For the past 10 to 15 years, it has rarely moved. It would use significant oil but otherwise is sound. The interior is still in excellent shape and I don't plan to redo that.
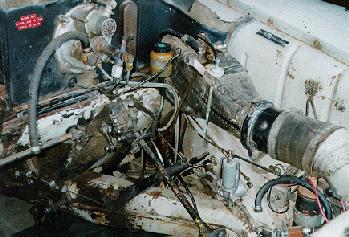
I originally started to remove the engine and transmission together out the top. But it is best to use one of those load-levelers that allow you to change the angle of the dangling engine/transmission. Without one, I fooled around changing the lift point for some time, but could not get sufficient angle to clear everything. I decided to drop the sub-frame assembly with the drivetrain. I have a 4-post car lift (the kind with ramps you drive onto) and I decided I could use this to lift the car off the sub-frame. In addition to disconnecting the usual links, hoses and wires for engine removal, you need to disconnect the front brake lines, roll bar, and steering shaft at steering box. I removed the three bolts that attach the sub-frame to the car; one was rusted and only turned about one turn with great effort on the breaker bar before it broke off. I then rolled the front of the car off the ramps so the ends were just behind the transmission, put blocks under the frame at the end of the ramps, determined that the center of gravity was behind the end of the ramps, and put blocks with jack under the sub-frame. I slowly raised the lift and watched for interferences. Don't forget the wires through the steering shaft! When lifted enough to clear the engine, the car also missed the top of the garage opening.
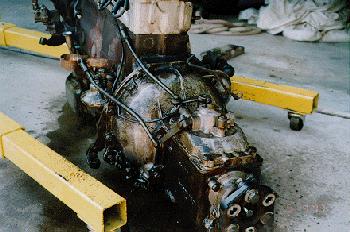
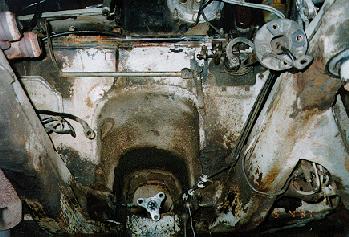
After getting the sub-frame with engine rolled forward and out of the way, I used an engine lift and a strap around the front frame member (below the radiator) to lift the front of the chassis and roll the car body back to the middle of the lift. Now the dirty work to clean it all. Engine and trans were cleaned with engine degreaser, then separated.
|
|
|
I disassembled the engine and (with a friend who owns some very accurate and expensive gauges) checked the wear on the bores and crank. There was a bad score on journal number 2. One cylinder had some serious pits in the cylinder wall. Wear of the cylinders was surprisingly little for 200K miles; about .003 inch maximum taper. Even the pistons are within specs. But it obviously needed re-boring. I purchased new pistons of the first oversize ($125 each). The machine shop bored the cylinders, reground the crank, did a valve job (needed two new valves and one guide), and reamed out the piston pin bushings (22 mm) to fit the new (24 mm) piston pins (220SE pistons are cheaper than 220S pistons). All the valve springs (all 24!) failed the load-at-compression specifications. Replacements are $5 and $3 each (outer and inner, respectively). Haven't yet picked up the parts from the machine shop. I have been consistent in putting all parts, with their proper bolts and nuts, into baggies with a small Post-it label to identify the part(s). I also use small-gauge wire to attach washers, bolts, nuts, or other parts to the main part. I've learned that I won't remember what went where, especially several years later (like with the Jag that was supposed to take less than a year...).
|
|
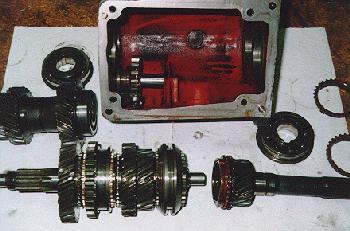
The transmission still worked great and didn't even leak, but first and second synchromesh were weak, so I ordered only two synchro rings and a gasket/seal kit. Transmission disassembly was straightforward and no special tools were needed. The shafts and bearings tapped out easily without need for pullers. There are rollers in the bearing under first gear, and they will spill out when you tilt the mainshaft to lift it out. Put the thrust washer back on (it sticks to the bearing) to prevent this.
I enjoy doing transmissions. Sort of the ultimate mechanical thing. Despite removing only the minimal parts to get to the synchros (I didn't take everything off the mainshaft), I still put the first/reverse gear ring on upside down. But I caught the error before final assembly, while manually testing the shift operation. Still trying to determine if first gear synchro is still supposed to be slightly different; some parts people say Mercedes superseded the unique first gear ring by a common ring for all 4 gears.
|
|
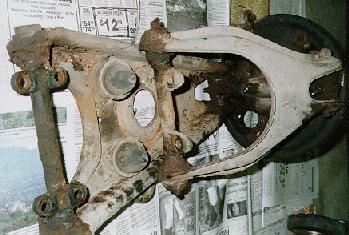
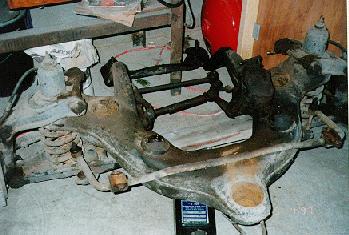
I used an internal spring compressor to remove the springs and then unbolted the a-arms. Very little wear, so no need for new parts. Just new rubber seals. After the a-arms were removed, I started to clean them. These are the hardest parts to clean. Lots of very hard caked-on grease that required much scraping and prying. So far, I've cleaned and sandblasted one side. Procrastinating on doing the other side... The sub-frame has been mostly cleaned and will be sandblasted before painting.
The steering damper is completely out of oil and ineffective, but the new ones are so expensive, I'm attempting to disassemble it. It's partially apart but haven't figured out how to get the piece off the end of the cylinder. This disassembly is basically for my education, especially if new seals are not available.
So far, only the master cylinder and front wheel cylinders have been disassembled. The "fluid" was very brown and "sludgy." However, I was absolutely amazed that the brake master cylinder and the front wheel cylinders had no pits or corrosion. No regular fluid changes for those 25-odd years, either. Amazing. Instead of rebuilt wheel cylinder kits at $18 each (X 4) and $34 each rear (X 2), I'm going to find just the rubber cups; because they are in inch sizes, even American rubber parts will fit.
|
|
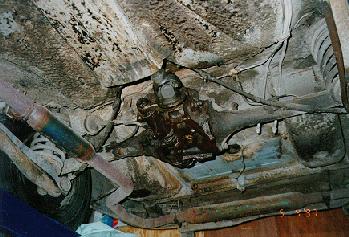
The rear end. Has had a serious leak from the front pinion seal since I've owned the car. Also a very noisy wheel bearing. Haven't touched the rear end yet.
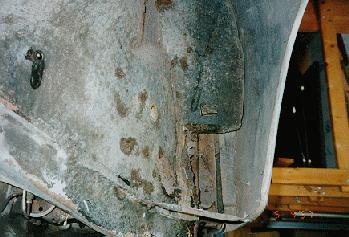
Rusted out panels behind front wheels (base of door posts). Only rust on the car. Rusted out because of the undercoating that was applied when new; it got old, cracked, and then retained water.
Right front fender (the one very poorly repaired by second owner). It's now off, but needs serious professional shrinking and reshaping behind the wheel arch. Probably better to get a used fender. Also need a good body man to straighten right door post hinge (which was misaligned slightly when the fender was hit) because that door doesn't close properly.
Scrape old undercoating and gunk from engine compartment and frame, repaint. Used an air gasket scraper that is quite effective and safer to metal than an air hammer. Also attacked the caked-on gunk with angle grinder with stiff wire brush. Will sandblast the corners and hard-to-reach parts.
More to come as progress is made.
|
|
|