1959 Type 220S Mercedes-Benz Ponton
Restoration Project - Part 2
Andrew H. Litkowiak / andylit@feralwombat.com / Illinois, USA
Well, it's that time again. After a brutal week at the office, I can relax with my Ponton project. I spend my days slapping insurance agents around. You can't imagine how stressful that is. They're worse than teenagers. Why, just this week I....but, that's a story for another day.
Last time we worked on the dash components and the interior fabrics. This time we'll get a bit more nutsy and boltsy. This segment deals with stripping everything out of the driver front door. I probably won't detail the other doors since you don't want to read the same chapter four times. Most of you, anyway. If you really need to, read this again after you finish.
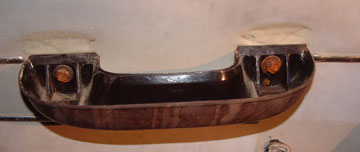
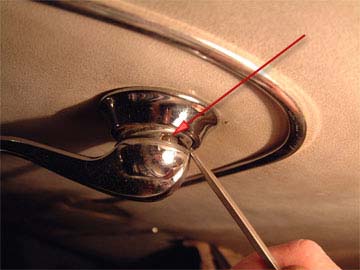
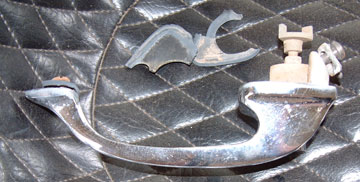
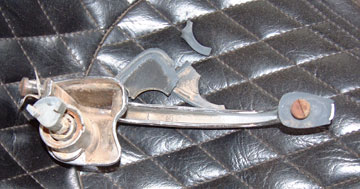
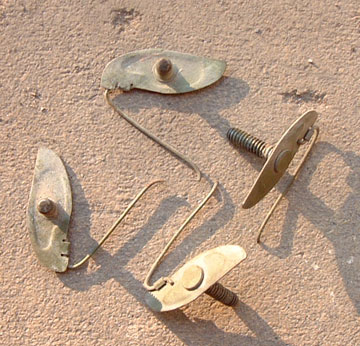
The first item I removed was the door handle. The handle has two parts, the padded upper section and the Bakelite base. The bottom of the handle has two screws. Remove these to allow the padded section to be freed up. The pad is probably firmly embedded into the handle. Just wiggle until it works free.
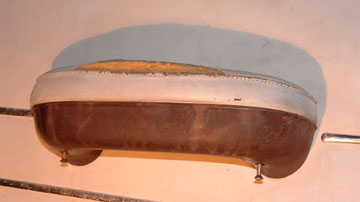
Ready - Set - Dismantle!
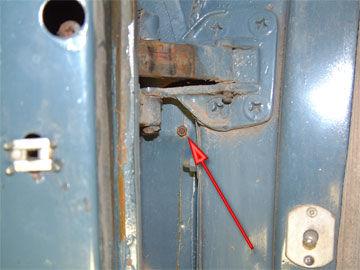
This will reveal two bolts that hold the handle to the door itself. Remove the bolts and the handle structure will come free from the door.
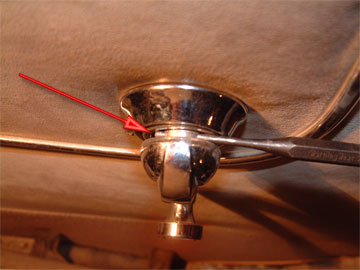
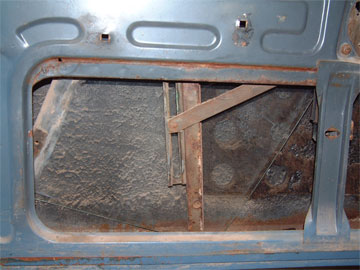
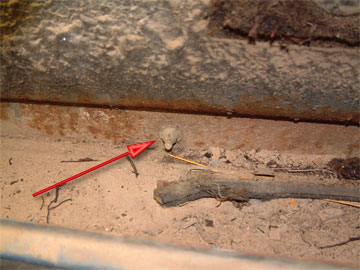
Notice the
rust - a natural humidity trap
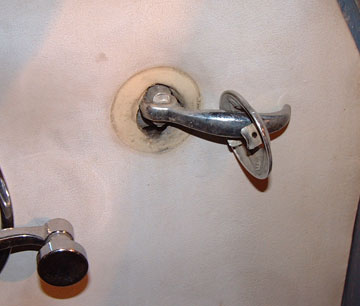
Next up is the door latch handle. As with some other interior items, the cap around the latch is snap on item. Gently work a flat screwdriver under it and twist. It should pop right off. Pull the latch out and rotate the cap to remove.
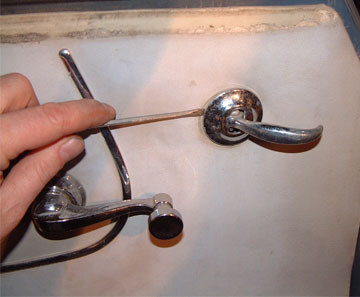
Work gently if you're retaining the
leather
The sun has bleached the
leather
The window crank handle is a little more interesting. Unlike the "C" clips in "modern" cars, the Ponton handles are held in place with pins. With a thin flat blade screwdriver, gently push the small trim ring in towards the door panel. Rotate the crank handle until the securing pin comes into view.
Gently! Don't scratch the
chrome
Now take a small drift or a long thin brad and use it to push the pin out of its shaft. The pin should come out easily. It is held in place by the outer trim ring, not friction. Once the pin is out, the handle, spring and both trim rings should pop right off. Bag it all up, but keep it handy. You'll need the crank handle during the removal of the window glass.
Grab the pin with a long nose
pliers to avoid losing it
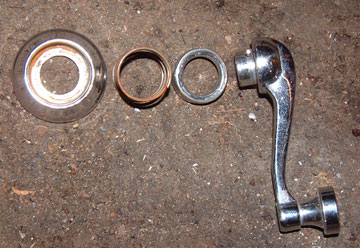
Ready to bag and
tag
You are now ready to remove the fabric covered trim panel from the door. The panel is held in place by spring clips and stationary trim slots. I was a little confused at first by the order of removal of certain parts. At first glance, it looks like one must remove the door latch mechanism before removing the fabric panel. This is not the case.
Starting just back of the front top corner, use your fingertips to gently pry the panel back. Looking down from the stop, you should be able to see the forward most spring clip. Put a flat blade screwdriver in right next to the clip and gently lever the panel loose. This should allow you enough finger room to work the rest of the clips loose, one at a time.
As you reach the back of the door, you will see that the half circle cutout is secured by a metal trim slot that is part of the latch mechanism. And, the entire bottom edge is held by a retaining slot that is part of the door structure. Once all the spring clips are loose, you will have to wiggle a bit to free the panel.
Be careful
here - some serious wiggling is required
Depending on your panel condition, some of the clips may pull out of the panel instead of the door. We'll deal with that problem a bit later. Another item for the future is the chrome trim on the fabric panel. Leave it in place until and unless you are recovering the panel with new fabric. We'll touch on this in a later episode as well.
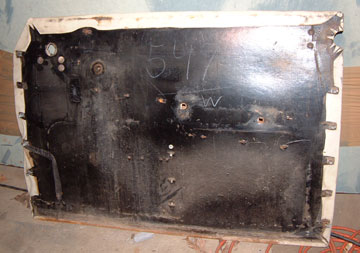
The black board is a thick particle
board
From this point, you don't have to follow any particular sequence. The rest came off in what appeared to me to be a logical order, but, to each his own. We already know that my brain works in strange ways.
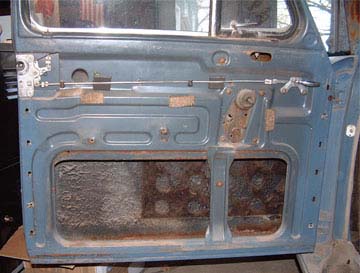
Notice the sound deadeners inside the
door
The camera again plays a big role here. When removing the latch components, I wanted very clear shots of how the latch transmission bar was hooked up. This fall or next year, I probably won't even remember taking the car apart, much less what parts hook up where and in what order. I shot both ends of the hookup for future use.
The transmission bar itself appears to ride in two round plastic pegs that mount to the door. In this case both pegs are broken off and floating free. These will be replaced during the installation.

More broken
parts
FLASH! I knew I forgot something. You need to start a list NOW of the items that need to be replaced. I just went back and created a list in Excel of missing or broken items that I'll need to purchase or fabricate. The broken pegs brought that to mind.
On with the story. I unscrewed the pull handle from the door, and then tackled the spring clip on the transmission bar. The clip is there to keep the bar end securely attached to the pull handle mechanism. The same is true at the opposite end on the latch mechanism.
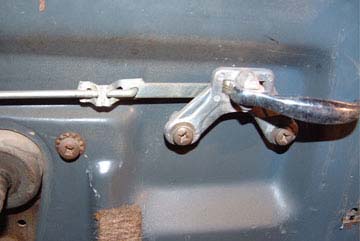
The "V" shaped flat is the spring
clip
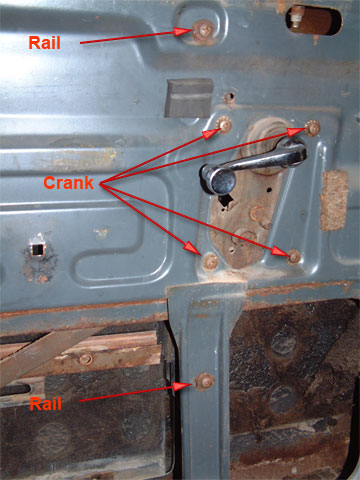
The latch mechanism is removed by pulling three large Phillips screws, two in the door end, one on the flat. Once you detach the transmission bar, there is no need for further disassembly. We may do that later for cleaning, but for now, leave it alone. This includes the lock button shaft. If you detach it, you just increase the chances of losing it.
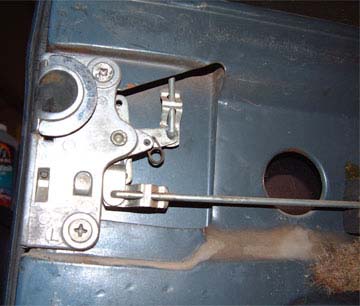
Notice the "L" for left near the bottom
screw; passenger side has an
"R"
Come to think of it, we will be doing some further work on this mechanism. This car arrived with no keys. I will be replacing the tumbler sets in all the locks. Locksmith? We don't need no stinking locksmith.
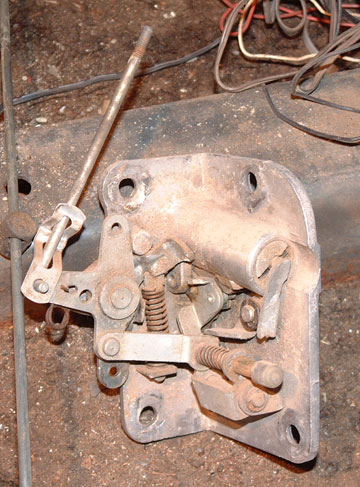
In need of heavy cleaning and some
grease

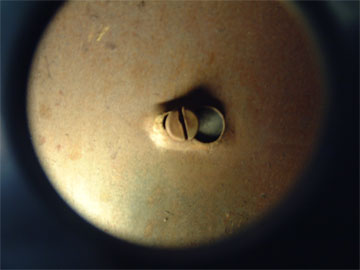
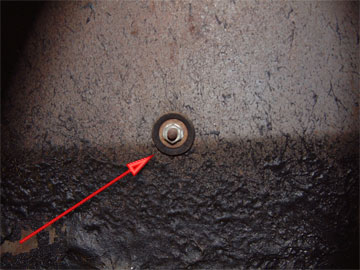
This screw secures the outer
handle
The second screw for the door handle is accessible through a circular opening in the inner door skin. The screw is mounted in a keyhole shaped opening. You don't remove this screw, but simply loosen it.
Ponton Peeper Cam!
With the rear screw removed, just push the door handle forward and the front screw will pop into the larger section of the keyhole and the handle comes right off. The rubber pads that protect the paint will almost certainly come out in pieces. Put these on your list.
Clean and polish and this should be just
fine
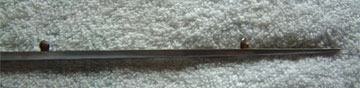
Time to yank out the window and crank assembly. Okay. Crank up the window. Hit it with a hammer. Remove remnants.
Or, you could do it the proper way. Grab the crank handle and lower the window until the bottom rail and two screws are visible. Remove the two large screws and set them aside.
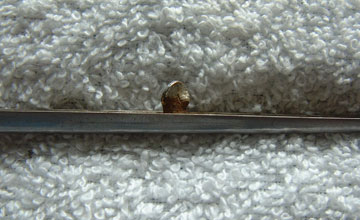
The screws actually penetrate the glass
pane
You can now lift the glass up out of the horizontal carrier and gently set it down inside the door.
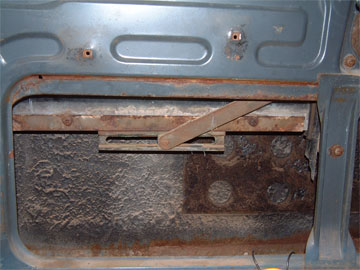
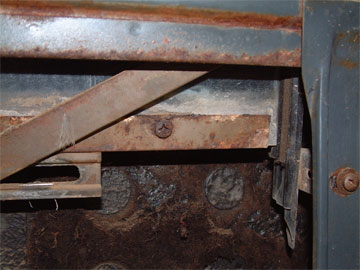
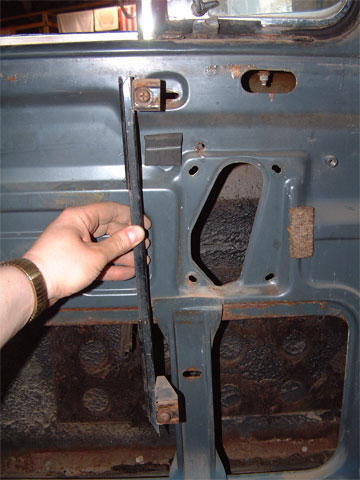
Next, detach the forward vertical window track rail. This is done by removing two large Phillips screws. The top screw is located just below the window opening about 1/3 back from the door front. The bottom screw is located on the vertical brace running from the door bottom to the inner skin panel.
With instructions like these, how can you miss?
Imagine this inside the
door
Once the screws are out, reach in and pull the window track rail out of the way. You can then rotate the window glass 90 degrees and slide it up and out through the slit that the window normally moves through. The 90 degree turn will allow the window slide up and past the door structure. The bottom of the glass will have a pair of plastic or rubber pads that surround the screw holes. In my case, these were crumbling and will be replaced.
The window is ready to be lifted up and
out
Usually, a person would also have to remove the horizontal felt strips that are present at the bottom lips of the window opening. In this case, those strips were already gone, with one of them sitting broken inside the door bottom.
Now that the glass is out, you can remove the window track seal. This is a long section of felt and rubber "C" channel. It is in the shape of an inverted "U." First, reach into the door and pull the seal away from the loose window track.
Once this is out, you can continue to pull the track away from the channel it rests in. You will also find the rear vertical window track during this operation. If you have removed it, shame on you. It is welded in place and you should have left it alone. Now you're in trouble.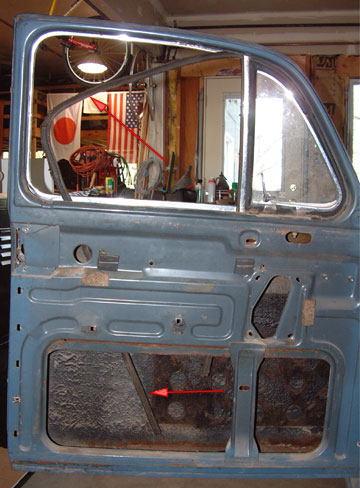
The track is partly
out
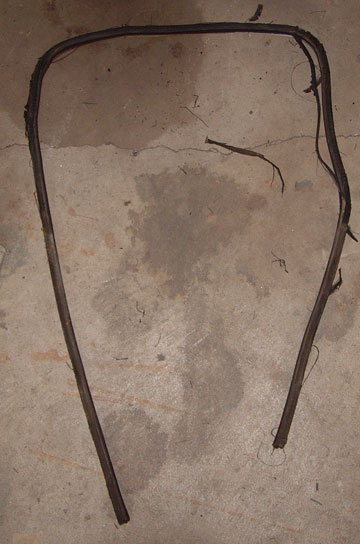
And there it
is
One of the first things you will notice is that the spring is missing from the crank mechanism. In this case, it has completely broken off, leaving only a small stub in place. Oh well, another item for the list.
The spring should be under the crank
handle
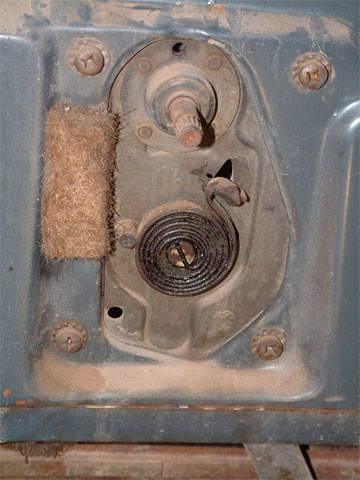
This is what it should look
like
To remove the crank mechanism, you will pull four large Phillips screws. The location is fairly obvious, at each of the four corners of the assembly. By wiggling the rail a bit, you can remove the entire assembly through the bottom of the door. At this point, retrieve the two screws that hold the glass in the rail and screw them back in. Hopefully, this will reduce the chance of loss. Set the entire assembly aside for future cleaning and repair.
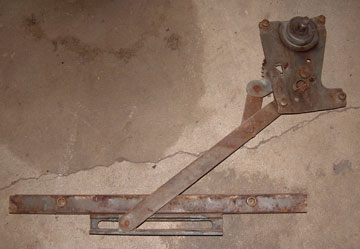
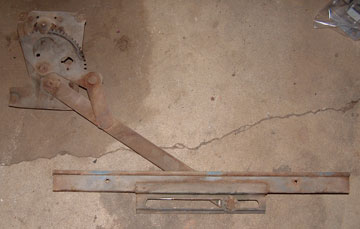
Rusty, but definitely
repairable
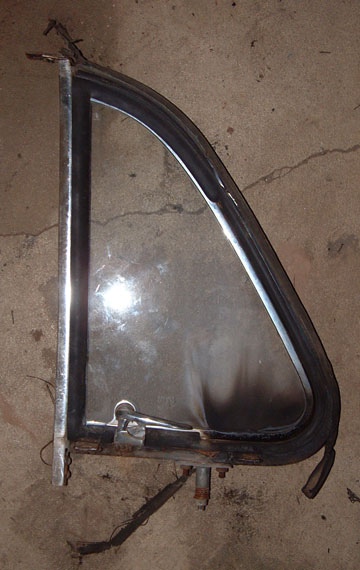
Now we go for the wing vent window. Two screws, slide back, tip and out. Simple, yes? If it was, would I have asked?
Remove these
screws
Slide back and then tip to
remove
Before the days of alchemy, the ancients knew of only 4 basic elements. Earth, Wind, Fire and Water. This is the perfect time to talk about three of the four. Actually, we'll be focusing on elemental interactions.
When Water mixes with the iron subset of Earth, we get rust. You folks from the Midwest, or as we call it, the "Salt Belt", can skip a couple paragraphs. You know what I'm about to say.
You folks from the arid regions, pay attention now. You've never seen rust. You think you have, but you're wrong. Rust is not a thin reddish film that can be sanded off a smooth metal surface. Rust is not a minor impediment to a perfect paint job.
Where I come from, rust looks like a team of dwarves glued brown Corn Flakes all over your car. Rust is the only thing that holds the holes together. And when it comes to screws and nuts and bolts, rust is the tie that binds men's souls and strips them of their humanity.
One of the two screws was locked in rock solid. It simply would not budge, and I was a hair's breadth away from stripping the head out. Rust. The scourge of the auto hobbyist.
And so comes the third element. Fire. You'll notice the soot marks on the wing window. Long experience has taught me how to deal with rust and with corrosion from dissimilar metals. Fire is good. Fire is your friend.
Burning rubber produces such an interesting
aroma
You can keep your penetrating oil and your impact hammers. Forget about all those notions and potions you see on cable TV. I have yet to encounter a frozen nut or screw that can stand up to good old elemental fire.
I use a simple self starting Bernz-O-Matic torch with a yellow bottle of MAPP gas. When I encounter a rusty nut, out comes the torch. The amount of heat depends on the size of the item and the depth of the rust. Sometimes 15 seconds is good and sometimes you need to go cherry red. The point is that the intense heat breaks the bond between the two parts. That is a far better thing than stripping a screw head or breaking off a bolt.
I applied heat to the screw for about 30 seconds. After that, it came out like it was greased. Yes, the rubber seal burned and smoked. That's okay. Chances are that when you've got a window rusted in place, the rubber is too old to salvage anyway. That ends our physics lesson for today.
After you get the wing window out, you'll remove the window opening chrome. This is the rectangular shaped piece that surrounds the opening. It has about six screws on the sides and top. Remove these and very gently start prying and wiggling.
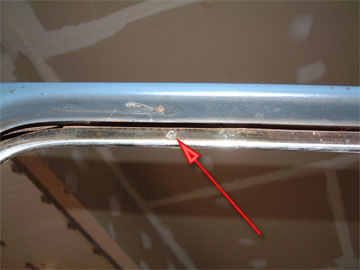
This is a single piece with a break at the top center. Be careful not to bend the piece. Aluminum can't really be bent back into shape like steel. Once bent, aluminum creases and discolors. You can never make it look perfect again.

Use extreme care here. This piece doesn't detach
willingly
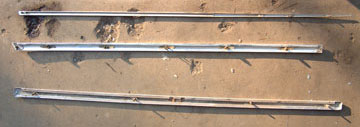
The last items on the door are the exterior trim strips. Unlike modern vehicles, the trim on our Pontons has a combination of different fittings. Threaded studs, nuts and screws and push/snaps are the norm here.
The 220S sedan has three trim strips on the front doors (two on the rear). Each strip has a different fastening system and has to be handled a little differently. The top strip is just below the bottom of the window opening. The second is at mid height below the window and the third is just above the door bottom.
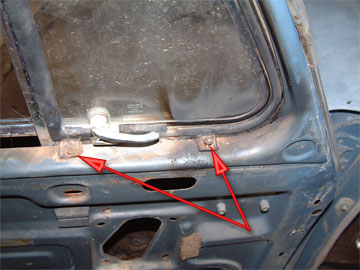
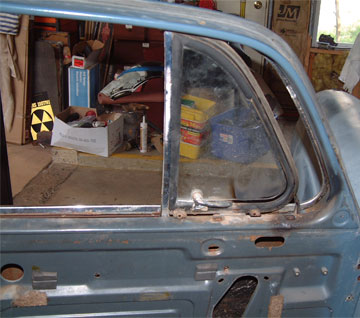
I'm not sure why I put this picture
in - it really doesn't show much, does it?
If you have not already peeled the rubber seal from around the perimeter of the door, now is the time to do it. You will need to get under the rubber to remove one of the trim strips. I'd like to say I knew this going in, but I didn't. I found out the same way you will if you don't read this section.
I started at the top and worked down. The top strip has push fittings that go through the door skin. It looks simple at first, until you realize that prying the strip away from the door isn't doing the trick.

Hmmmm
- this should pop right out

Definitely a BAD
idea
After a bit of head scratching, I realized that there are also a pair of screws that are hidden under the rubber door seals. These screws go into threaded holes at the very ends of the trim strips. The screw heads are filled with trim adhesive and are a minor pain to remove. Better than trying to pry the ends off though. I hope you didn't try that.
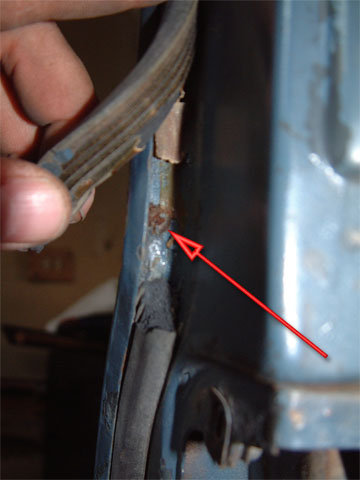
Yes, that really is a Phillips
head
The center strip is really weird. It starts at the front of the door with a nut penetrating the skin forward of the main door body. Next, you move back into the door body and remove the nuts on the inner door surface.
Another sneaky
fastener
7mm nuts for the center
strip
Don't be surprised if the last one backs the stud out into your hands. You haven't broken anything. Unlike the forward studs which are removable rail inserts, the last stud is screwed into a threaded holed in the trim strip.

Center trim
strip
Twist tabs
Tab up close - be gentle here
After the last two pieces, the bottom strip is merely frustrating. It is secured with a single fastener type. These are odd looking spring-loaded track mounted studs.
Lower trim
fasteners
They are secured with a simple nut on the door inner. Unfortunately, they are located just below a curve in the door skin. This makes removal kind of a pain. A nut driver won't fit, nor will a wrench. You will need a ratchet and socket with a universal swivel. Be prepared to curse a bit during this operation.
Tough to reach; also note the deceased window felt
Okay. That's it. Step back and observe your handiwork. You now have a bare naked Ponton door. Hey, hey, none of that. Get you mind out of the gutter. For those of you who have been following along for real, I hope you don't need your car in a hurry. The next chapter will definitely not be door reassembly.
That's all for now. Back to the old insurance mine. Hopefully I'll survive another week to come home and write for you again.
Created: May 11, 2004
© www.mbzponton.org