Len Sokoloff / len@sokoloff.com
North Carolina, USA / 1959 220S cabriolet
Type 220S Valve Adjustment and Checking Timing Chain Stretch
The Mercedes-Benz owner's manual recommends that valve adjustments be done every 2,500 miles. For me that generally means that I do it every spring before the driving season starts. The valve adjustment should only be carried out on a cold engine, i.e. one that has not been started in at least 12 hours. No special tools other than standard metric tools are required, although it may be helpful to have a 14mm crow's foot attachment and one of the bent 14mm wrenches used to adjust the valves on a Mercedes-Benz Type W123 diesel. Of course the appropriate feeler gauges are also needed.
The procedure below and the photos all refer to the six cylinder Type 220S Mercedes-Benz Ponton with Type M 180.924 engine. However, much of this information is also applicable to other Pontons.
|
Valve Clearance Specifications (dimensions in mm) |
||||
| Model | 220a | 180a 180b 190 190SL | 180c | 219 220S 220SE |
| Inlet | 0.08 | 0.10 | 0.08 | 0.12 |
| Exhaust | 0.20 | 0.20 | 0.15 | 0.20 |
The set up of the valves are such that the first and last valves are exhaust valves and the valves between are grouped in twos. For example, the valves go like this where "EX" represents an exhaust valve and "IN" represents an intake valve:
| Cylinders | 1 | 2 | 3 | 4 | 5 | 6 |
| Four cylinder | EX IN | IN EX | EX IN | IN EX | ||
| Six cylinder | EX IN | IN EX | EX IN | IN EX | EX IN | IN EX |
Valve Adjustment Procedure
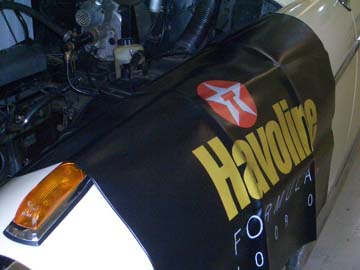
Protect your fenders with covers. No matter how careful you think you will be, accidents always happen. There is no need to take a chance on damaging your paint. Also be careful about leaning on the fender clearance light or the heater box. They can also be easily damaged.
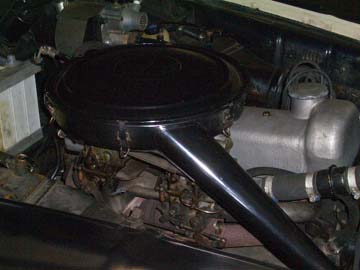
Loosen the two screws using a large screwdriver and remove the air filter housing.

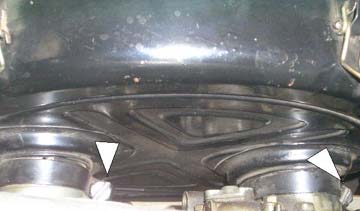
Remove the three 14mm bolts holding the valve cover in place. As a side note, those three bolts are identical to the bolts needed to screw into the brake drums to get them off, so if you are ever stuck needing one, you are always carrying three of them with you. Be careful not to lose the small copper washer on each bolt. Older Pontons will have three thumb screws holding the valve cover in place. Remove the valve cover along with the rubber gasket and set it aside.
It is recommended that you check the tightness of the head bolts once you have removed the valve cover. Do not loosen them, but tighten any that might be loose to 78nm. I do not recall if I have ever found one to be loose. The bolts are checked using a 10mm Allen (hex) socket.
Exhaust valve side

Intake valve side
| Intake valve | 1 | 2 | 3 | 4 | 5 | 6 |
| Exhaust valve | 1 | 2 | 3 | 4 | 5 | 6 |
The exhaust valve adjustment bolts/screws are on the driver's side of the car. The intake valve bolts/screws are on the passenger side. I find it helpful to make a chart like this one (above) and check off each valve as it is adjusted. I also measure the valve adjustment before I change it and note that value so that I might see if a pattern develops indicating a problem.
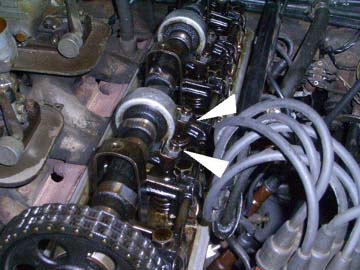
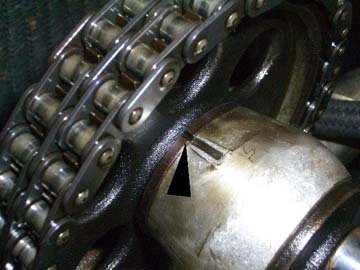
In order to adjust the valves properly, you must move the cam for that particular valve to a position where the lobe of the cam is pointing away from the rocker arm sliding surface. There is a bit of flexibility here, so you do not have to be terribly anal about getting it perfect. Basically, the base circle of the cam faces the sliding surface of the rocker arm.
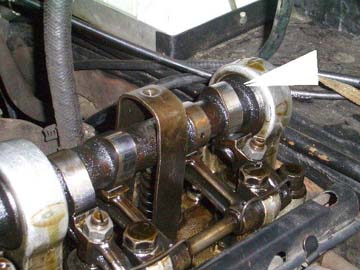
The cam lobe on the valve shown here is in the proper position for adjusting.
There are several ways for you to turn the engine to position the cam lobes properly. I prefer to jack up a rear wheel, put the car in fourth gear and release the parking brake. Then I just turn the wheel by hand until the cam lobe is where I want it. You can also use a 22mm socket on the crankshaft bolt to turn the engine. I find that this method does not work well for me. It is just too much trouble to work around the interference from the fan blade. Some people may also try to just jog the starter until the engine gets to the position they want. It is wise to disconnect the center wire of the distributor if you use the starter. A car starting accidentally with the valve cover off can be a little messy. For me it is just much easier and safer to just turn that rear wheel. No matter which method you use to turn the engine, always be sure that you turn it in the direction of its normal rotation which would be clockwise as you are standing in front of the car.
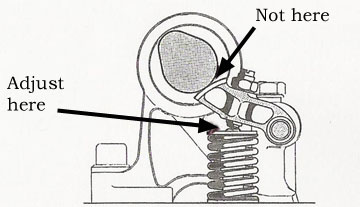
Once you have a cam lobe in position, adjusting the valve is rather easy. Loosen the hex nut with a 14mm wrench or socket (you can use a socket on the exhaust valves) and tighten the screw to reduce the clearance or loosen the screw to increase the clearance. Use the appropriate feeler gauge until the clearance is correct. The feeler gauge is inserted between the adjusting screw and the valve stem.
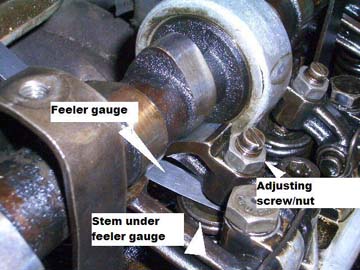
Do not adjust the valves by using the feeler gauge between the rocker arm sliding surface and the cam, although doing it this way will not be catastrophic. Your adjustments will just be slightly larger by maybe 0.01mm.
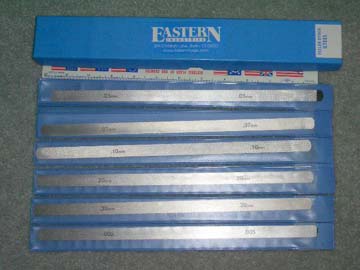
The feeler gauge should slip in with a bit of resistance. A correct adjustment has been described as the feeling you get when pulling a wet hair through your fingers. Once you have the valve correctly adjusted, tighten up the nut without disturbing the setting on the adjusting screw to lock it into place Check the adjustment again once you have tightened the nut to make sure the clearance did not change. Then move on to another valve. There is no need to do them in any particular order. Just do them according to which cam lobe is pointing the right way and keep track of what you have done and know which ones you still need to do. If the valve adjusting nuts are damaged and/or starting to round off, replace them. They are readily available from Mercedes-Benz dealers and are only about a buck each. I have also found that it is easier to use feeler gauge stock that is longer than the typical feeler gauges sets you generally find. I purchased one foot long feeler gauge stock from Eastern Industries, www.easterngage.com.
Checking for Timing Chain Stretch
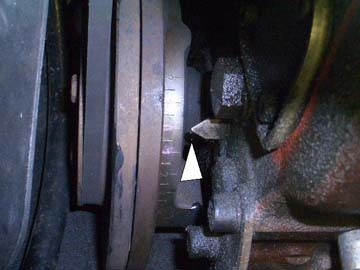
While the valve cover is off, it is wise and very easy to take a look at the timing chain and check it for stretch. Turn the engine until the notch on the compensating washer and the notch on the first camshaft bearing are matched up.
Then read what number the timing pointer is showing. Once your chain stretch gets to more than five degrees, you may want to consider replacing the chain.
Replace the valve cover and gasket. Make sure that both the gasket and the surface of the head where it will rest is clean and free of any dirt and debris. A new gasket is recommended, but I have sometimes reused my old one if it was in good shape. Alternately snug down the three bolts/washers holding the valve cover in place. Make sure the gasket does not get twisted or pinched as you are tightening the valve cover. Sometimes after a test drive you may notice some oil seeping from the gasket area. When this happens to me, a little more tightening of the valve cover has always solved the problem. Replace the air filter housing and tighten the two screws to secure it in place. Look around to make sure you have not left any tools in the engine bay. If you used the crankshaft bolt to turn the engine, definitely make sure you did not leave the ratchet in place. Leaving the ratchet on the crankshaft bolt and starting up your engine can ruin your whole day, not to mention your radiator, your fan blade and who knows what else. Start the car to make sure everything is in order. Take the car out for a short drive if you have time to make sure it does not leak and to hear the sound of correctly adjusted valves.
Created: September 25, 2006 / Jeff Miller
© www.mbzponton.org