Cooter is a male, Yellow-bellied Slider (Trachemys scripta scripta) and was hatched sometime during the first part of 2001. He resides in the western Finger Lakes region of New York state. Because the winters get very cold there, he had to (previous to this project) over-winter in an indoor, heated, 30 gallon pond. After this project was completed, he started spending the cold months in an indoor, unheated (room temperature), 100 gallon Rubbermaid stock tank (Rubbermaid No. 4242).
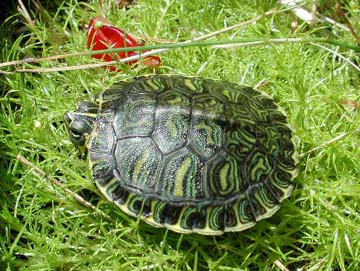
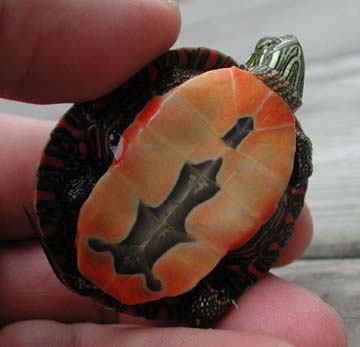
The photo above shows Cooter in early July 2001, when he was about 4-6 months old. He looks a little shy, and not quite sure what to make of his new life in captivity. This may have been the first time he basked in bright sunlight. He may have spent his entire life up to this point indoors. Notice how bright and ornate his carapace (top side of the shell) pigmentation is.
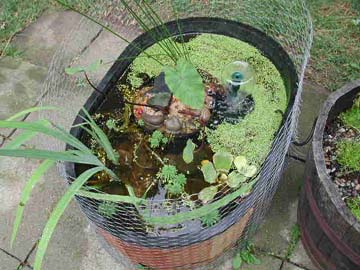
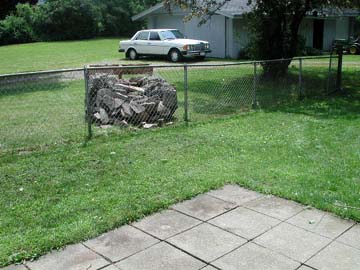
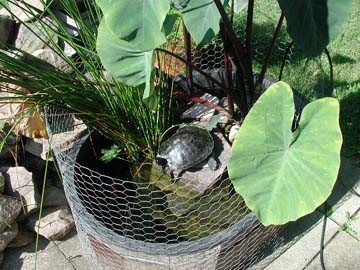
This was Cooter's first pond in July 2001. It was hard to find him inside this "huge" enclosure. Note the chicken wire fence around the pond. This was originally to prevent my dogs from munching on the water lettuce and fish food. Even though we no longer had the dogs, the fence was kept in place to keep raccoons and birds out. This pond was taken inside for the winter months and placed near a southern facing sliding glass door, so it received some limited sunshine. The pond plants also survived in these conditions, from October to May.
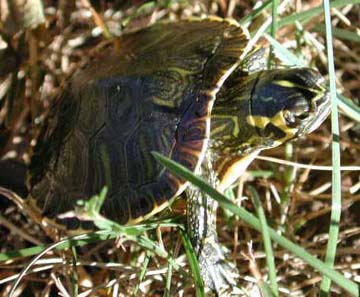
Late summer, 2001: Exploring the deep, uncharted wilderness of the back yard.
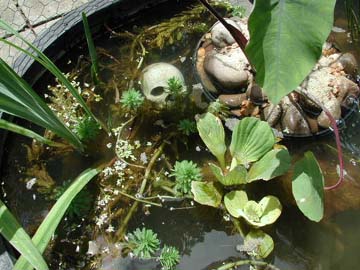
Detail of the original 30 gallon pond later in the summer of 2001. I think the skull belonged to the postman. Where is Cooter? He was lost in this pond when he was a young tike, but the easy life agreed with him, and he just kept growing.
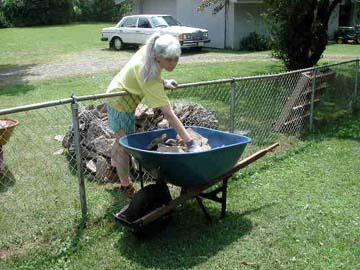
As time passed, and Cooter became an adult, he outgrew this tub. In July 2004, he still had enough (albeit limited) room to bask and maneuver under water, but the time to enlarge his habitat had come.
Pond Construction Project (July 5 - 17, 2004)
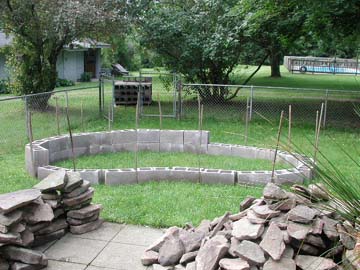
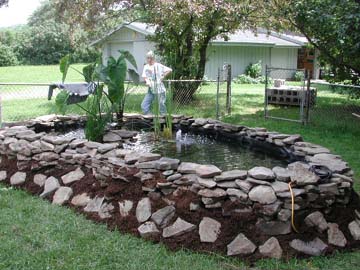
Cooter's new pond was designed to be an above-ground 12' x 6' kidney shape. The foundation was made of 8" x 8" x 16" cinder blocks stacked two high to give a wall height of 16." The liner was 45 mil EPDM rubber and there was a felt underlayment. The sides were capped off with the larger, flat field stones. The outside wall has an earth shelf about 12" high (up to about the middle of the second cinder block) and almost 12" wide. On this earth shelf, we stacked the remainder of the Pennsylvania field stones.
Day 1 (July 5, 2004):
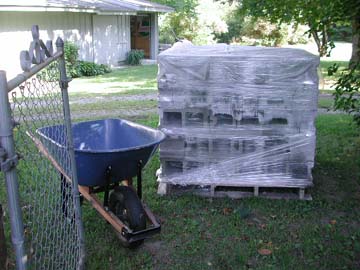
The pallet of flat Pennsylvania field stones was delivered on Monday, July 5, 2004. The photo shows exactly where the truck dumped them. You can just make out the pallet sitting vertically behind the pile of stones. Would this be enough stones to complete the pond enlargement project?
Doing the grunt work. Moving stones from point A to point B.
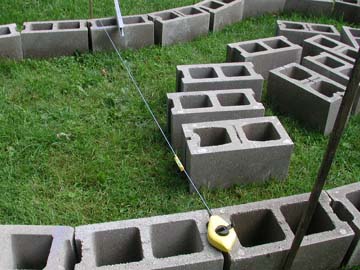
We stacked them up, and separated them into two piles. The pile on the right were stones that would make the best cap stones. The other pile will be used on the exterior wall of the pond.
Day 2 (July 6, 2004):
The pallet of cinder blocks arrived Tuesday, July 6, 2004. We only needed about 50 (the pallet contained 90), so now we had some extras for future projects.
Day 3 (July 10, 2004):
The basic shape was laid out, and the wooden stakes were used to help level the blocks. We decided not to dig down, but rather, build up. We had a large pile of dirt in the back yard that was used to build up the foundation where needed.
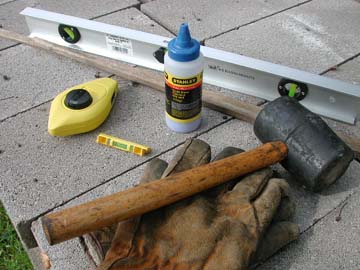
Here are the basic tools. I also used a 25' tape measure (not shown) to lay out the size of the kidney shape. The larger, lemon yellow gizmo is basically a roll of string enclosed in a compartment containing blue talc powder. The talc powder is in the bottle with the blue top.The small yellow thing in the photo is a "line level" (or "string level"). The level is supported by the extended string (see photo below). When the level's air bubble is in the center, snap the string against the wooden stake to create a temporary mark with the blue talc powder. Then use a Sharpie to make a permanent reference line on each stake.
The "line level" and string in use.
See the level hanging from the string?
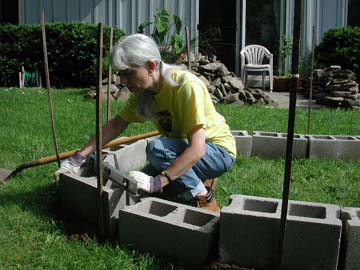
Making sure each block is level. Just look at that concentration!
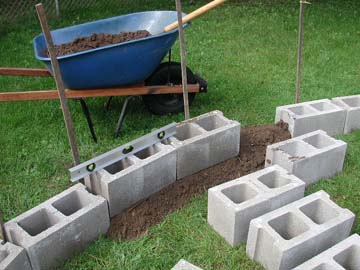
Starting to build up the lower wall (the south side) of the foundation. Notice the dirt placed under the cinder blocks to raise them up to the level mark on the wooden stakes.

The first layer of blocks were leveled.
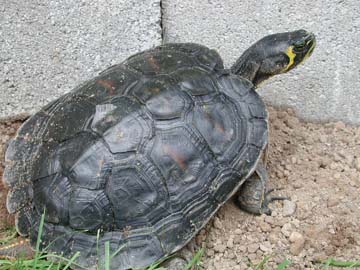
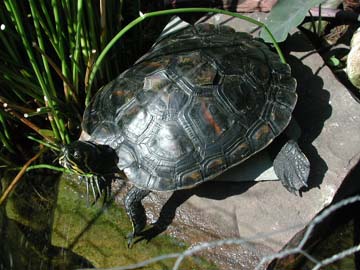
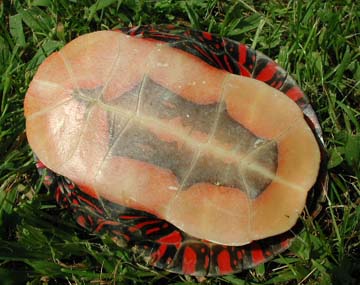
Cooter walking about the inside perimeter of his new pond during construction. "Hurry up, I want to go swimming!" It is interesting to see how much of his original pigmentation was lost as he aged. He went from vivid green, with ornate yellow patterns, to almost black in three years. His plastron (under side of shell) is still true to his "Yellow-bellied slider" name though.
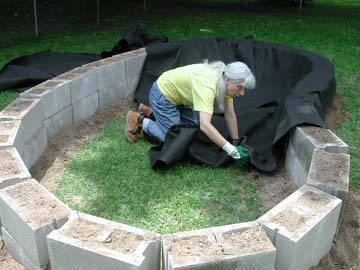
Laying the felt underlayment. We had two pieces of felt. We had to figure out the best way to install the pieces so they covered the entire area.
This is another shot of the felt underlayment installation.

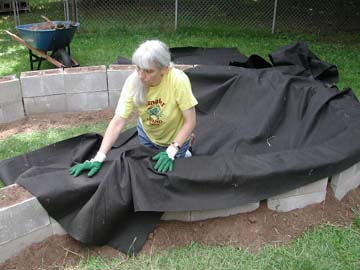
This is the 18' x 10' sheet of 45 mil EPDM rubber liner. It was surprisingly heavy.
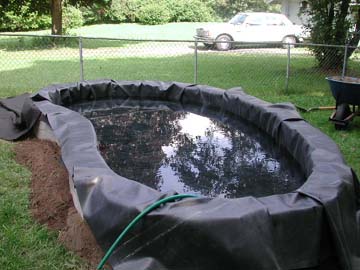
Filling the pond. This is the time to fix any creases in the liner.
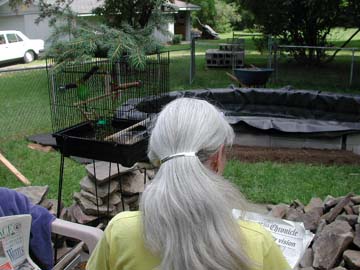
Taking a breather while the pond fills. Even our parakeet, "Victor" got in on the act. I placed some pine branches on top of his cage to help keep him quiet, but when he goes outside, he generally makes a lot of noise.
End of Day 3 (July 10, 2004):
Here, the pond was filled, and the cap stones were in place. The next day (Sunday) we placed the field stones around the outside edge of the pond.
Day 4 (July 11, 2004):
Here is our star enjoying a bask during the last moments in his original home. In a few short minutes, he would be moved into his new SUPER POND!
Up close and personal: "I'm moving to a better place, you can't touch me!"
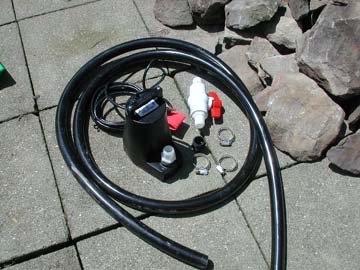
A pump for general circulation (used later, on the waterfall), 10 feet of 1" diameter hose, a ball valve to adjust the flow, and three hose clamps.

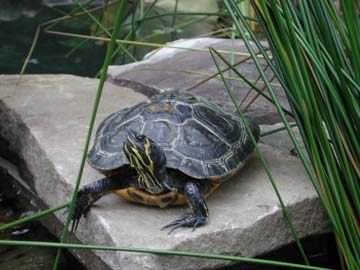
A few plants taken from the old pond, a few new stones, and you have an island in the sun. See Cooter swimming on the left.
Last photo of Day 4 (July 11, 2004):
A few more plants added (cattail, water poppies and duckweed from the pond store), some water flow, and some of that "ground cover material to prevent weeds from growing." We wanted to finish the basic setup that weekend, but there comes a time when you just can't lift another stone.
Day 5 (July 17, 2004):
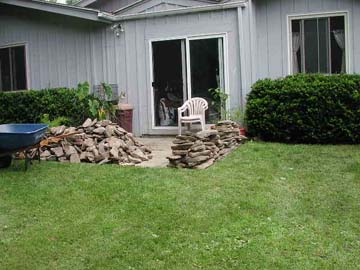
We finished placing the rocks along the edge of the base of the pond, and covered the area near the grass with mulch.
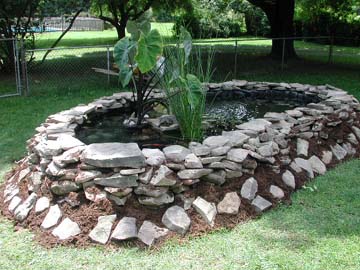
We finished laying the ultimate dosage of stones and mulch by mid afternoon, but discovered that we needed about 25 more field stones to complete the south side (not visible in this photo). We went back to the pond store for them. See Cooter basking on the island in the center.
This was the view looking east. Note how shady it got by 2:30 p.m. The trees were pruned back a little, so direct sunlight was available throughout the afternoon hours. Power for the water pump was coming from an extension cord (visible in the photo).
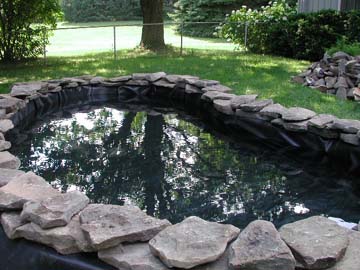
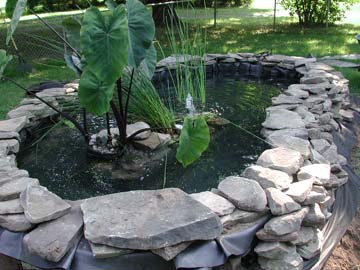
Cooter enjoying his new luxury home.When the basic setup was completed, we focused on pruning the trees, and adding more plants and other livestock (gold fish, and another turtle).
Update: July 24, 2004: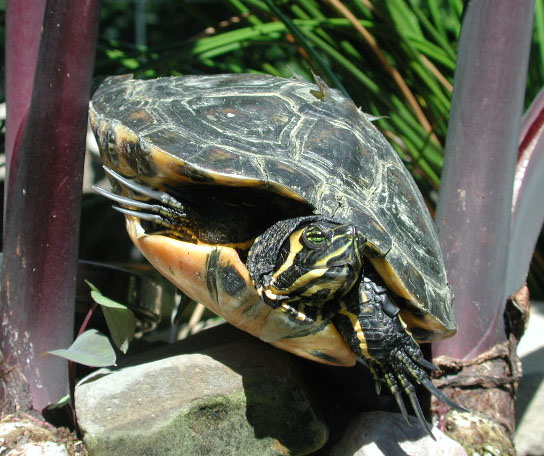
One of Cooter's more awkward basking positions in the new pond, wedging himself between two plants.
Update / August 15, 2004:
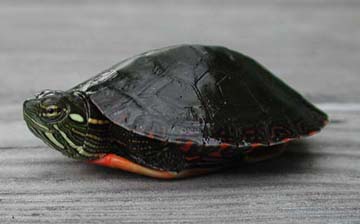
Bought what appeared to be a male Midland Painted turtle (Chrysemys picta marginata) from "The Fish Place" at 141 Robinson Street, North Tonawanda, NY. This is the best tropical fish store in all of western NY state.
These photos were taken August 18, 2004. This was one of the first times I was able to grab him from the pond for a photo shoot. He was not relaxed at all. When I went into the back yard, if he was basking, he darted off the rocks immediately, and swam for cover. His name was "Shel" (after Shel Silverstein).
Shel appeared to be about two years old, and had a colorfully patterned plastron. It took him a few days before he stopped hiding at the bottom all the time. I noticed him basking on the rocks with Cooter a few days after putting him into the pond. This turtle escaped during the summer of 2006 and we never found him.
Update / August 31, 2004:
On the morning of August 31, 2004, I found a small female Midland Painted turtle in our in-ground swimming pool (not the turtle pond). We named him "Audi" for a 2000 Audi that crashed and rolled in the field opposite our house that morning around 02:30.
September 4, 2004:
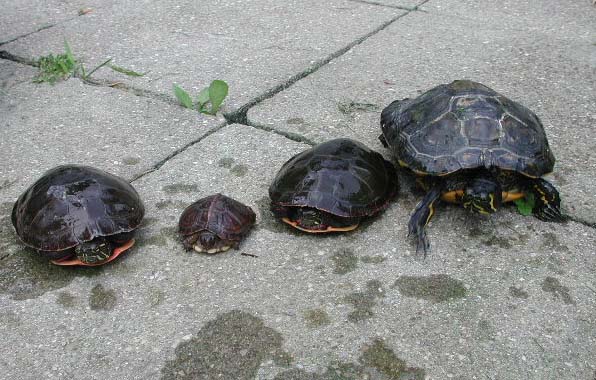
In the photo, from left to right: "Shel" (male Midland Painted; escaped summer of 2006), "Camouflage" (female Three-Toed Box), "Audi" (female Midland Painted), "Cooter" (male Yellow-bellied Slider).
Update: July 27, 2008:
On the afternoon of Sunday July 27, 2008, I found a Midland Painted turtle hatchling in the back yard. His tail was quite long, so I suspected he was a male. The carapace diameter was about 45 mm.
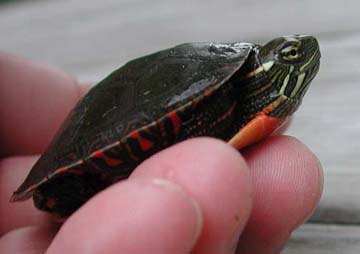
Photos of Midland Painted turtle hatchling taken July 28, 2008.
This little fellow spent the summer (from July 28, 2008 to September 21, 2008) in the outdoor pond. After that, he was taken inside for the winter, to reside in a five gallon aquarium. I watched him closely to make sure he started to eat commercial food. I believe he grazed on pond algae all summer. I never saw him eat anything after coming inside for the winter. He died on December 10, 2008.
August 2010 / Somewhere in Ontario, Canada
Camera: Canon AE-1 Program with Kodak ASA 200 film
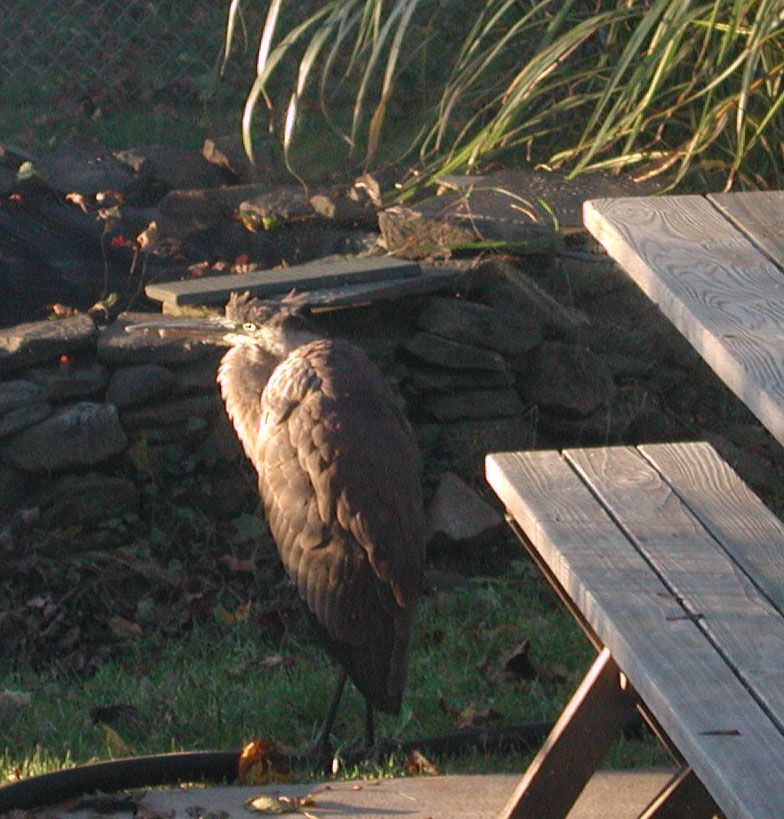
October 21, 2011 / Heron looking for an easy pond breakfast
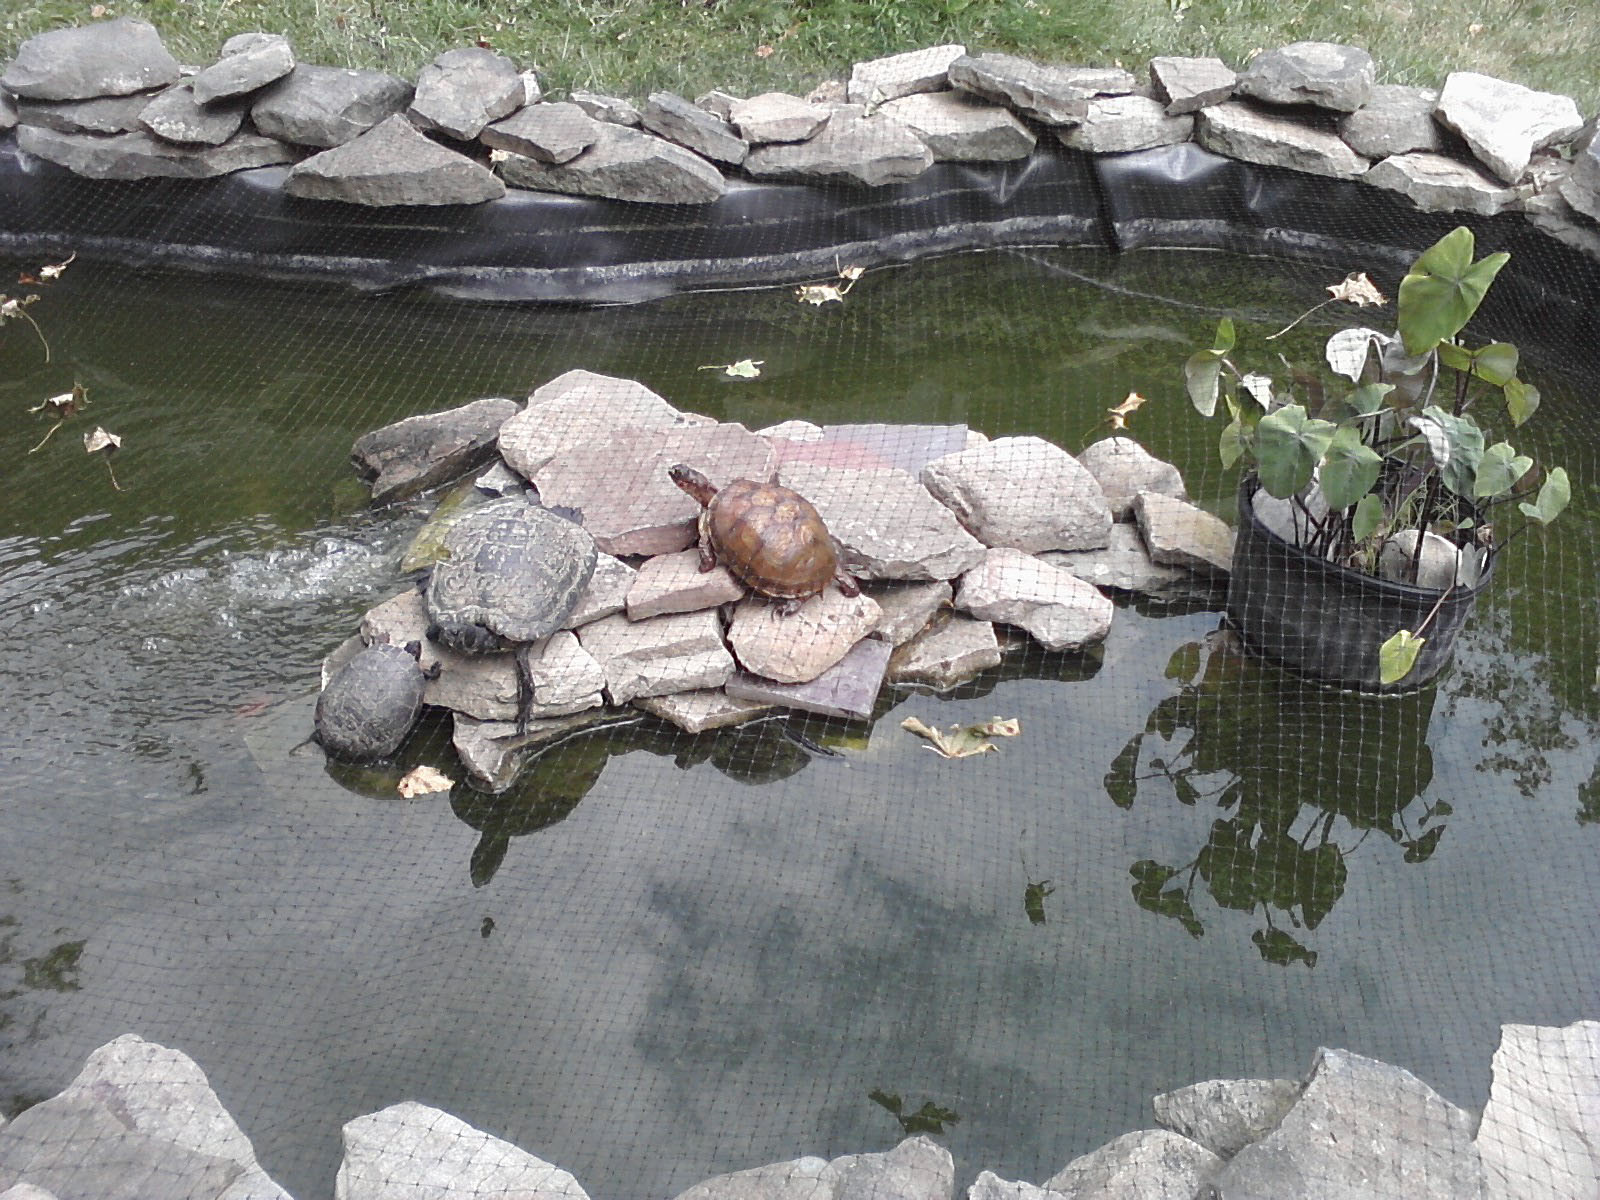
July 22, 2012: Left to right: Audi, Cooter, and Camouflage (a
decent swimmer for a box turtle)
Camera: LG cell phone
This photo shows the bird netting used for protection against the heron who occasionally comes and stares into the pond. Unfortunately, the netting limits the type of plants that can be used.
Even though Camouflage is a Three-Toed Box Turtle, spending most days on dry land, she swims quite well, and benefits from the sunshine in the summer months. We usually place her in the pond during the day, and bring her in at night.
- Earthworms and/or red worms from bait shop
- Super worms from reptile shop
- Lettuce (from refrigerator)
- Repto-Min (commercially available)
- Dried shrimp and flies (commercially available)
- Cherries (in season)
- Berries (in season)
- Trout Chow (5 mm pellets). Available in small quantities from "The Fish Place" 141 Robinson Street, North Tonawanda, NY 14120.Tel. 716-693-4411 / Jake Mang, Manager
- "SHO-KOI Impact Floating Pellets." The pellets I got measure about 3 mm diameter. Smaller than some fish pellets I have seen (the 5 mm variety) but larger than what they feed trout fry. One pound sells for $5.50 (July 2004) at Willow Pond Aqua Farms.
- Duck weed (obtained from natural local ponds during the summer).
Heat
- Submersible, 250W Ebo-Jäger aquarium heater. I turtle-proofed the heater by securing it in a length of thick, black, PVC pipe with numerous 10 mm holes drilled in it for water circulation. The heater was successful in keeping the pond at 21° C (70° F) over-night throughout July and August. We had a cool summer, so the night time temperatures were dipping down to 15° C (high 50s). I did not use the heater after the first summer.
Notes / Links
-
- World Chelonian Trust (WCT) / by Darrell Senneke
- The Turtle Puddle / by Mary Hopson
- A 100 gallon Rubbermaid stock tank (No. 4242) sold for $86 at Country Max, and served as the indoor (winter months) pond.

Established: July 10, 2004
Links Verified October 7, 2022
© Black Sparrow Photography / Jeffrey P. Miller (N2AWA)